Deer Run Acres — Farm Guide
From Hatch to Harvest: The Beginner’s Complete Guide to Raising Pasture-Raised Laying Hens
Everything you need to know to raise 5–30 happy, productive hens on pasture — from your first chick to your first egg and beyond.
Planning: Before Your First Chick Arrives
The decisions you make now determine how smoothly your first year goes.
This guide is written for people planning to raise a small flock of 5–30 laying hens on pasture. You don’t need a poultry science degree. You don’t need commercial-grade equipment. You need a plan, some basic supplies, and the willingness to learn as you go. Chickens are forgiving animals — they’ll meet you halfway if you give them the basics: shelter, feed, water, space, and protection.
Choosing Your Breed
For a first-time flock focused on egg production and pasture life, you want birds that lay reliably, forage well, tolerate weather, and have a calm temperament. Here are the breeds we recommend:
| Breed | Eggs/Year | Egg Color | Notes |
|---|---|---|---|
| ISA Brown | 300–350 | Brown | Egg-laying powerhouse, friendly, excellent first-time bird |
| Golden Comet | 250–300 | Brown | Sex-linked hybrid, hardy, consistent layer |
| Black Australorp | 250–300 | Brown | Great forager, calm, cold-hardy |
| Barred Plymouth Rock | 250–280 | Brown | Dual-purpose, docile, excellent in cold climates |
| Rhode Island Red | 250–300 | Brown | The classic farm hen, tough and productive |
| Buff Orpington | 200–280 | Brown | Gentle, great with kids, cold-hardy, tends toward broody |
| Ameraucana / Easter Egger | 200–250 | Blue/Green | Adds egg basket color variety, good forager |
These breeds will give you 250 or more eggs per year under good management. They forage actively on pasture, handle cold winters and hot summers, and they’re docile enough that collecting eggs and handling the birds isn’t a fight. If you want a colorful egg basket, mix a few Ameraucanas or Easter Eggers in with your brown-egg layers.
When to Start Your Chicks — This Matters More Than Most People Realize
The single best thing you can do for your first year of egg production is time your chick start date correctly.
The Strategy
Start chicks in late February through early April. They’ll reach point of lay (18–22 weeks old) by mid-summer, right when natural daylight is at its peak — 15 to 16 hours per day. This means your hens come into production under the best possible conditions, and their first natural molt won’t hit until the following fall. You get a solid 12–14 months of egg production before the first break.
Starting chicks in fall is a common timing mistake. Those birds reach laying age in the dead of winter with short days. They will still lay — but production will be significantly lower without supplemental light, and you’ll spend months feeding birds that are barely producing. Worse, fall-started pullets will molt their first fall just like every other hen — meaning you only get roughly 8–9 months of laying before their first break, instead of the 12–14 months you’d get from a spring start. That’s a big difference in feed cost per egg during that critical first year.
How to Get Your Chicks
You have four options, and the right one depends on your situation:
1. Ordering from a hatchery. The most common route. You select your breeds, choose your quantity, and chicks are shipped to your local post office as day-olds. Plan ahead — popular breeds sell out by January and February for spring shipments. Most hatcheries have minimum orders (often 3–6 for cold-weather shipping, sometimes 15–25). Chicks arrive stressed from shipping, so have your brooder warm and ready with electrolyte water. Expect a small percentage of shipping losses on occasion.
2. Local farm store. Tractor Supply, local feed mills, and farm supply stores carry chicks seasonally (usually March through May). Convenient — you pick them up, no shipping stress. Downside: limited breed selection, and they may be straight-run (unsexed), which means you could end up with roosters.
3. Incubating your own. Covered in detail in the next section. Best as a second-year project after you have a rooster and established flock. Also a fantastic education project if you’re homeschooling or have kids who want to experience the full cycle.
4. Buying started pullets (16–20 weeks old). You skip the entire brooding phase. These are birds that are fully feathered, nearly ready to lay, and go straight into your coop. This is the easiest path, and it deserves an honest cost discussion:
Are Started Pullets Actually More Expensive? Probably Not.
Started pullets typically cost $18–25 per bird. That sounds steep compared to $3–5 for a day-old chick. But consider the true cost of raising a chick from day one:
- The chick itself: $3–5
- Brooder equipment: Heat lamp or heat plate ($30–75), brooder container, thermometer, chick waterer and feeder — you’re in for $60–120 in supplies, even on a budget.
- Feed to 18 weeks: Each dual-purpose pullet consumes roughly 15–17 lbs of feed from hatch to point of lay. At current feed prices ($18–22 per 50-lb bag), that’s about $6–7 per bird in feed alone.
- Electricity: A 250-watt heat lamp running for 6–8 weeks adds up. A heat plate is more efficient but still draws power.
- Mortality: Even experienced keepers lose chicks. Shipping stress, coccidiosis, failure to thrive, temperature mishaps — a 5–10% loss rate is normal. Every chick that dies still cost you the purchase price and the feed it consumed.
- Time: Brooding chicks requires daily attention for 8+ weeks — checking temps, cleaning waterers, monitoring health, managing bedding. Your time is worth something.
When you add it all up, the true cost to raise a chick to 18 weeks is often $12–18 per bird — and that’s before you value your time. A started pullet at $20 that goes directly into your coop and starts laying within 2–4 weeks is often the cheaper option, especially for first-timers who don’t already own brooding equipment. You also eliminate the heartbreak of losing chicks you’ve been caring for.
There’s nothing wrong with brooding chicks — it’s a rewarding experience and the right choice for many people. Just know that “cheaper per bird” at the hatchery doesn’t mean cheaper in total cost.
Incubation: Hatching Your Own
A great second-year project — or a rewarding adventure if you’re up for it from the start.
Let’s be honest: most first-time chicken keepers should buy chicks or started pullets. Incubation adds a layer of complexity, expense, and potential frustration. But if you have a rooster, want to hatch from your own flock genetics, are preserving a specific breed, or want the experience of watching chicks emerge from eggs — incubation is deeply satisfying when done right.
Incubator Types — What’s the Difference?
Still-Air Incubators are the budget entry point. They have no internal fan, which means heat rises and creates temperature layers inside the unit — as much as 5–7°F difference from top to bottom. You set the temperature to 101–102°F measured at the top of the eggs (where the embryo develops), and you manage humidity manually with water troughs or wet sponges. They work — people have hatched chicks in still-air incubators for generations — but they require more attention and the margin for error is tighter. Overheating is easier in still-air models and is the most damaging mistake. Best for: small batches, tight budgets, experienced hatchers.
Forced-Air Incubators have a built-in fan that circulates air throughout the unit, eliminating temperature layers. Set the temperature to 99.5°F — the fan keeps it uniform everywhere. Humidity is easier to manage because the air is moving consistently. This is the right choice for most beginners who want to incubate. The fan makes everything more predictable and forgiving. Most forced-air models also include automatic egg turners, which saves you from manually turning eggs three times a day.
Units with Built-In Humistats take it a step further with an electronic humidity sensor and automatic regulation. Humidity is the trickiest variable in incubation — too dry and chicks can’t pip out of the shell; too wet and they drown. A built-in humistat monitors relative humidity in real time and adjusts automatically. If you plan to hatch regularly, the extra cost pays for itself in better hatch rates and less guesswork.
The Basics That Matter
- Incubation period: 21 days for chicken eggs.
- Temperature: 99.5°F (forced-air) or 101–102°F (still-air, measured at egg-top height). Consistency is more important than perfection — avoid chasing decimal points. Minor fluctuations of half a degree are tolerable. Sustained temperatures above 103°F can kill embryos.
- Humidity: 58–60% relative humidity during days 1–18. Increase to 65% or higher during lockdown (days 18–21). Low humidity during incubation causes oversized air cells and dehydrated, weak chicks. High humidity causes undersized air cells and chicks that can’t pip.
- Turning: Turn eggs at least 3 times daily (odd numbers so the egg doesn’t rest on the same side every night). If hand-turning, mark each egg with an “X” on one side and “O” on the other so you can track it. Stop all turning at day 18.
- Candling: Use a bright flashlight or candling light to check embryo development at days 7, 14, and 18. You’re looking at the size of the air cell and whether blood vessels and the embryo are developing normally. Remove any eggs that are clear (infertile) or show stopped development.
- Lockdown (Day 18–21): Stop turning, raise humidity, and do not open the incubator. This is the hardest part. The chicks are positioning themselves to pip. Opening the lid drops humidity and can cause the membrane to dry out and shrink-wrap the chick inside the shell. Resist the urge.
Where to Get Hatching Eggs
Your best source is your own flock — if you have a rooster running with your hens, most eggs will be fertile. Collect eggs intended for hatching promptly and store them at room temperature (55–65°F), point-end down, and set them within 7–10 days for best results. Do not refrigerate hatching eggs — the cold will kill the developing embryo before incubation even begins.
Handle hatching eggs with care: do not wash them or get them wet. Every egg is laid with a natural protective coating called the bloom, which seals the pores in the shell and prevents bacteria from entering. Washing removes the bloom and dramatically increases the chance of contamination and failed development. If an egg is visibly soiled with manure or mud, discard it — don’t try to clean it. Start with clean nest boxes and collect eggs promptly, and most of your hatching eggs will be clean enough to use as-is.
You can also buy hatching eggs from local breeders or have them shipped, but shipped eggs have lower hatch rates due to handling and temperature fluctuations during transit. Expect 50–70% hatch rates from shipped eggs versus 80–90% from your own fresh eggs in a well-managed incubator.
Keep It in Perspective
Incubation is a skill that improves with practice. Your first hatch may not go perfectly — and that’s okay. Keep notes on your temperature, humidity, and hatch results, and adjust for the next round. The process of watching a chick break out of an egg never gets old, no matter how many times you do it.
Brooding: Day 0 Through 8 Weeks
A warm box, clean water, good feed, and close attention. That’s the whole job.
Brooding is the phase between hatch and the point where chicks are feathered enough to handle outdoor temperatures. It’s hands-on work for about 6–8 weeks, but the setup is straightforward.
Brooder Setup
Your brooder is any draft-free container large enough to hold your chicks with a heat source at one end and room to move away from it at the other. A galvanized stock tank, a large plastic storage tote, a wooden box, or a dedicated commercial brooder all work fine. Start with roughly half a square foot per chick and expand as they grow — by 4 weeks they’ll need more room.
Bedding: Pine shavings, 2–3 inches deep. Never use newspaper (too slippery — causes a condition called spraddle leg where the chick’s legs splay out and can’t support its weight). Never use cedar shavings (the aromatic oils are toxic to chicks’ respiratory systems). Pine shavings absorb moisture, control odor, and give chicks solid footing.
Heat Sources
Heat lamps are the traditional choice — cheap to buy, easy to find, and effective. They are also the number one cause of coop and barn fires in the country. If you use a heat lamp: clamp it securely AND add a backup chain or wire so it can’t fall into the bedding if the clamp fails. Keep the bulb at least 18 inches above the bedding surface. Use a red bulb to reduce pecking behavior. Check the fixture, cord, and connections regularly. Do not hang a heat lamp by its cord.
Radiant heat plates (like the Brinsea EcoGlow or similar) are the safer alternative. They sit low and chicks huddle underneath them like they would under a mother hen. They use far less electricity than a 250-watt heat lamp, they can’t start a fire, and chicks can self-regulate by moving closer or farther away. The upfront cost is higher ($40–75), but for peace of mind alone, they’re worth it — especially if you’re brooding in a garage, shed, or anywhere near combustible materials.
Radiant Heat Plates Need a Light Source
Unlike heat lamps, radiant heat plates produce no light at all — which means your chicks are in the dark unless you add a separate light. This matters. Chicks need a light/dark cycle to develop proper circadian rhythms, learn to find feed and water, and behave normally. Add a standard white light bulb to your brooder on a timer. Run it during daytime hours and let it go dark at night, mimicking a natural day/night cycle. This is not optional with a radiant heat plate — without it, the chicks are either in total darkness or you’re leaving a light on 24/7, neither of which is good for their development.
Temperature Schedule
| Week | Temperature at Brooder Floor | What to Watch |
|---|---|---|
| 1 | 92–95°F | Chicks spread evenly, active, eating and drinking |
| 2 | 87–90°F | Raise lamp / adjust plate slightly |
| 3 | 82–85°F | Feathers developing on wings |
| 4 | 77–80°F | Body feathering progressing |
| 5 | 72–75°F | Nearly fully feathered |
| 6–8 | Ambient (~65–70°F) | Wean off heat source entirely |
Watch the Chicks, Not Just the Thermometer
Chick behavior is your best thermometer. If they’re huddled directly under the heat source piling on top of each other, they’re too cold — lower the lamp. If they’re pressed against the walls avoiding the heat, they’re too hot — raise it. If they’re spread evenly around the brooder, eating, drinking, and exploring, you’ve got it right.
Feed and Water
Feed: Chick starter, 18–20% protein, from day one through 6–8 weeks of age. Available at any farm store. You’ll see medicated and non-medicated options — the medicated version contains amprolium, which helps prevent coccidiosis (a common intestinal parasite that kills chicks). It’s not an antibiotic. For first-timers, medicated starter is good insurance.
Water: Clean, fresh water available at all times. Chicks drink roughly twice as much water (by weight) as they eat. Use a chick-sized waterer for the first few weeks — a standard gallon waterer is too deep and chicks can drown. Add a splash of electrolytes to the water for the first 2–3 days, especially if chicks were shipped. Clean and refill waterers daily — chicks foul their water constantly.
Common Issues
Pasty butt: Droppings stick to the vent area and harden, blocking the chick from passing waste. Left untreated, it’s fatal. Check chick vents daily for the first week. If you see paste, soften it with a warm damp cloth and gently clean it off. It’s common, it’s messy, and it’s easy to fix if you catch it.
Chick piling: If chicks are piling on top of each other in a corner, something is wrong — usually a draft, insufficient heat, or a light source that’s creating a single hot spot. Address the cause.
Spraddle leg: Legs splay outward and the chick can’t stand. Almost always caused by slippery brooder floors (newspaper, smooth plastic). Proper bedding prevents it. If caught early, it can sometimes be corrected with a small bandage hobble between the legs to hold them in position while the tendons strengthen.
Transitioning Outdoors: Weeks 8–16
Fully feathered and ready for the real world — almost.
By 8 weeks, your chicks are mostly feathered and can handle outdoor temperatures above 50°F comfortably. If you started them in March as we recommended, this transition happens in May or June — ideal weather in most of the country.
Hardening Off
Don’t throw them outside overnight. Gradually introduce them to the outdoors over 1–2 weeks. Start with a few hours during the warmest part of the day in a protected area — a small pen on the grass, a covered run, or even just an open-top box in a sunny sheltered spot. Extend the time each day. They need to experience sun, wind, grass, and natural temperature swings before they live in it full-time.
Intermediate Housing
An enclosed run attached to a small coop is perfect for this phase. The birds learn to forage on grass, experience weather, and establish their nighttime roosting routine in a safe environment. They’re still too small to free-range unsupervised — hawks are a real threat to young birds, and at this age they don’t have the instincts or speed to escape.
The Grower Phase
At 6–8 weeks, switch from chick starter to a grower/developer feed at 14–16% protein. Continue this feed until about 18 weeks of age when they transition to layer feed. The grower feed has lower protein and no added calcium — you don’t want high calcium in a growing bird’s diet; it’s hard on developing kidneys. Save the layer feed for when they actually start producing eggs.
By 12–16 weeks, your birds should be spending full days outdoors and locking into their coop at night. They’ll be close to full size, establishing their social order, and starting to look like real chickens instead of awkward teenagers.
Homing Birds to a New Coop
Chickens are creatures of habit. Once they’ve learned where “home” is, they’ll return to it every evening — even if you’d rather they went somewhere else. This becomes a real issue in two situations: when you’re moving young birds from a brooder setup into a pasture coop, and when you’re transitioning your flock between a summer coop and a winter coop (or vice versa). If you just open the door to the new coop and hope for the best, your birds will walk right past it at dusk and head back to wherever they slept last night.
The fix is simple: lock them in the new coop for 3–5 days with no access to the old one. Keep them confined inside the new coop with food, water, and bedding. They eat, sleep, and roost in it. By the third or fourth night, they’ve mentally reset — this is home now. After that confinement period, you can open the door and let them range during the day. They’ll return to the new coop at dusk on their own.
If the old coop is within sight or walking distance, block access to it during the transition period. Birds that can see or reach their old coop will beeline for it. Remove it from the area if it’s portable, or close and block the door so there’s no option. You want the new coop to be the only available roosting spot until the habit is fully established.
This applies every time you move birds to a new sleeping location — brooder to first coop, summer coop to winter coop, winter coop back to summer pasture setup. Three to five days locked in, every time. It’s not complicated, but skipping it will have you chasing chickens at dark trying to carry them one by one to where they’re supposed to be.
Adding New Birds to an Existing Flock
Simpler than the internet makes it sound.
If you’re starting your very first flock, skip this section — all your birds are growing up together and there’s nothing to integrate. This applies when you’re adding new pullets to an established group.
The Nighttime Method
Wait until after dark when your existing flock has roosted and settled in for the night. Place the new birds on the roost next to them. Everyone wakes up together in the morning and works things out naturally.
That’s it.
The internet will tell you to spend weeks running parallel fencing, doing supervised introductions, and watching for signs of aggression. In reality, chickens have been sorting out pecking order for thousands of years without human project management. The key factors that determine whether integration goes smoothly have nothing to do with elaborate introduction protocols:
- Adequate space — birds with room to move away from each other don’t fight.
- Sufficient feed and water stations — add an extra feeder and waterer for a few days so nobody gets pushed off resources.
- Cleanliness and low stress — a healthy, well-managed flock doesn’t have pent-up aggression looking for an outlet.
- Size-matching — don’t add 8-week-old chicks to a flock of full-grown hens. Wait until the new birds are at least 14–16 weeks old and close to the same body size.
There will be some pecking and posturing for a day or two. That’s normal. It’s how chickens establish social order. As long as nobody is getting pinned down and injured, leave them to it. They’ll sort it out faster without your interference.
Pasture Setup: Coops, Fencing, and Grazing
Where your birds live, how they move, and how to keep the land healthy underneath them.
Moveable Summer Coops — Two Approaches
There are two fundamentally different styles of mobile housing for laying hens, and the right one depends on your flock size and land situation:
The Egg Mobile (Salatin-style): This is a wheel-mounted coop — essentially a chicken house on a trailer frame — with roosts, nest boxes, and covered feed storage inside. The hens free-range out of it during the day, usually contained behind portable electric poultry netting. The coop itself gets moved every 2–3 days within the fenced area to distribute manure evenly, and the entire setup (netting and coop) shifts to fresh pasture when the current area has had enough impact. This model was popularized by Joel Salatin as part of a system where laying hens follow cattle on pasture, scratching through cow manure to eat fly larvae and spread the manure — cleaning and fertilizing the pasture in one operation. Best for flocks of 20+ birds with pasture access.
Note: This is different from Salatin’s meat-bird pens (the 10’×12’ floorless pasture pens). Those are designed for broiler chickens that stay inside the pen at all times. They’re not appropriate for layers, which need roosts, nest boxes, and room to range.
Small Portable Coop-and-Run Combos: These are the enclosed, all-in-one units you see at farm stores and online — a small coop house attached to a wire-enclosed run, often on wheels or light enough to drag. The birds live in the unit full-time, and you move the whole thing daily or every few days to fresh grass. Great for flocks of 5–10 birds. The birds stay contained — which means lower predator risk, no egg-hiding games, and no escaped hens in your neighbor’s garden. The tradeoff is less foraging freedom and you need to move them more frequently because the small footprint gets impacted fast.
Space Requirements
| Area | Space Per Bird | Notes |
|---|---|---|
| Inside the coop (sleeping/roosting area) | 2–4 sq ft | More is better — reduces pecking and litter issues |
| Open pasture (ranging behind netting) | 15+ sq ft | Enough room to forage naturally without destroying the ground |
| Enclosed coop-and-run combos | Total footprint matters | Move frequently — every 1–2 days — to keep birds on fresh ground |
Nest Boxes
Provide one nest box for every 4 hens. Each box should be roughly 12”×12”, placed at least 18–24 inches off the ground, and lined with clean shavings or straw. Place them lower than the roosts — hens roost at the highest point they can reach, and if the nest boxes are highest, they’ll sleep in them and foul them up.
Consider Roll-Away Nest Boxes
Roll-away (or roll-out) nest boxes have a gently sloped floor that lets the egg roll forward into a padded collection tray as soon as the hen stands up. This does two important things: it keeps eggs dramatically cleaner (they roll away from dirty feet and droppings), and it nearly eliminates egg breakage and the bad habit of egg eating. Once a hen learns to eat broken eggs, it’s almost impossible to stop — and the behavior spreads through the flock. Roll-away boxes prevent the problem before it starts.
You can buy commercial roll-away inserts, or build your own with a piece of plywood cut at a slight angle (about 10–15 degrees) lined with a strip of indoor/outdoor carpet or rubber shelf liner for cushioning, and a collection tray at the front. Simple to construct and it will save you a lot of frustration with dirty or broken eggs.
Electric Poultry Netting — Done Right
If you’re ranging your birds on pasture (not using an enclosed coop-and-run), portable electrified poultry netting is essential. Standard poultry netting comes in 42” or 48” heights and 100’ or 164’ rolls. It contains the birds, deters ground predators (fox, coyote, raccoon, stray dogs), and sets up in minutes once you have the routine down. Train your hens to respect it by running it fully energized from day one — they’ll bump it, get a jolt, and learn to stay well clear.
Choosing Your Netting — Not All Nets Are Equal
Premier 1 Supplies is the name most people hear first, and they make good accessories — but in our experience, their actual netting has a weakness: the built-in posts aren’t stiff enough to hold the fence upright and taut, especially after a few seasons of use. A sagging net with leaning posts is a net that touches the ground, shorts out, and stops working when you need it most.
Our recommendation: Kencove Farm Fence and their Fencers Choice brand netting. The Fencers Choice nets feature a dual step-in spike at the bottom of each post, which drives into the ground more securely and holds the fence upright without leaning or sagging. It’s a noticeable difference in daily use — the fence stays where you put it. Kencove is a Pennsylvania-based agricultural fencing supplier that carries everything you need: netting, energizers, testers, gates, and grounding equipment.
Other reputable sources for electric poultry netting include Starkline (good budget-friendly option with decent post rigidity), RentACoop (commonly available online), and Gallagher (a well-established name in livestock fencing). Whatever brand you choose, pay attention to the post construction — that’s where cheap nets fail first.
Setting Up Netting Right
When you set your netting, install support stakes with guy ropes at each corner to pull the fence tight. The corner posts take the most tension and are the first to lean inward, which lets the net sag and droop toward the ground along the whole run. A simple fiberglass step-in post or metal T-post at each corner with a rope or bungee pulling the net outward keeps everything taut. This takes two extra minutes during setup and makes the difference between a fence that stands up properly and one that’s on the ground by morning.
But here’s where most online guides fail you: the energizer (fence charger) matters far more than the netting itself, and most guides dramatically undersize it.
The standard advice is to match a small solar charger to your net length and call it done. That advice doesn’t account for reality. At night — when predators are actually hunting — dew collects on the grass touching the bottom lines of the net. Wet grass against energized wire bleeds voltage to ground. By 2 AM, when a fox is testing your fence, that little charger may not be pushing enough voltage through the net to deter anything.
The Rule: 1 Joule of Output Per Net
Your energizer needs to deliver at least 1 joule of stored energy per net of poultry netting you’re running. This is enough power to push through grass pressure, rain on the lower lines, and morning dew — the conditions that exist precisely when predators are most active. If you’re running two nets, you need a 2-joule energizer. Three nets, 3 joules. Don’t cheap out here. A fence that works on a dry afternoon but fails at 3 AM in the dew is worse than no fence at all — it gives you false confidence.
Choosing an Energizer
Energizers are powered by AC (110V plug-in), DC (12V battery), or both. Here’s what matters in practice:
If your pasture setup is within extension cord distance of an outlet, running on AC power gives you the most consistent, reliable output regardless of weather or season. No battery to monitor, no solar panel to keep clean.
If you’re running netting on remote pasture without electrical access, you need DC power — a 12V deep-cycle battery, ideally paired with a solar panel to keep it charged. These work well but require monitoring: battery health degrades over time, and short winter days may not generate enough solar charge to keep up. Check your battery voltage regularly.
The best option for most small-flock operations is a dual-powered unit that does both — plug it in at the barn, or hook it to a battery on pasture. One charger, every situation.
We strongly recommend name-brand energizers only. Specifically: Speedrite for their dual-powered “Unigizer” line and Cyclops for AC-only powered units. Both are professional-grade fence chargers built for real agricultural use. They deliver consistent, full-power shock, they’re repairable, and they last for years.
Speedrite’s dual-powered units are especially practical because both the 110V AC adapter and 12V DC battery leads come in the box — you don’t choose one or the other at checkout. You get one unit that plugs into a wall outlet when you have power available, and connects to a 12V deep-cycle battery (with optional solar panel) when you’re out on remote pasture. That flexibility means one energizer covers your winter coop setup and your summer pasture rotation without buying separate chargers.
Take it from us — we’ve purchased multiple less expensive chargers over the years thinking we’d save money. Every one of them either failed within a season, couldn’t maintain voltage under grass load, or couldn’t be repaired when a component went. The cheaper up-front price leads to more expense and more headaches in the long run. Buy a quality energizer once and be done with it.
Invest in a fence gate. If you’re moving in and out of the netted area daily for chores, egg collection, and moving the coop, stepping over the netting or unhooking a section every time is tedious and risks damaging the net. A proper gate kit lets you create a gap you can open and close without de-energizing the fence or bending the netting. This is one area where Premier 1 Supplies excels — their gate kits and insulated gate handles are well-made and reliable. It’s a small purchase that makes daily management significantly more convenient.
Check your energizer voltage regularly with a fence tester — not just by listening for the click. You want to see at least 3,000–4,000 volts on the net under normal conditions. If it’s dropping below that, you’ve got a grass contact, a broken wire, or a failing charger.
Free-Range vs. Enclosed — An Honest Comparison
Free-ranging behind netting gives your birds the maximum foraging experience — bugs, grass, seeds, dust bathing in the sun. It’s the ideal picture of pastured poultry. The downsides are real, though: higher predator risk (especially from hawks and owls, which netting doesn’t stop), hens hiding eggs in creative places you’ll never find, and more labor managing the fence setup and moves.
Enclosed portable coops give you control — easy egg collection, minimal predator exposure, simpler daily management. The birds have less foraging range, but if you move the unit frequently to fresh grass, they still get greens, insects, and sunshine. For most beginners with 5–15 birds, this is the simpler, lower-risk entry point.
There’s no wrong answer. Many people start enclosed and shift to open ranging behind netting as their confidence grows and they add predator deterrents.
Pasture Health
Chickens can destroy ground fast, especially in a small area. Don’t let them turn your pasture into a mud lot. Move them before you see bare dirt. A mixed grass-and-clover pasture recovers quickly with rest — the manure they leave behind fertilizes the regrowth. If you also raise cattle or other livestock, running chickens behind them is the gold standard of regenerative pasture management. The hens scratch through manure, eat fly larvae and parasites, spread the manure evenly, and sanitize the pasture — benefiting both the land and the cattle that will graze it next.
How Much of Their Diet Comes from Pasture?
Less than most people assume. Research from multiple university extension programs consistently shows that pasture provides only about 5–20% of a hen’s daily nutritional needs, depending on pasture quality and season. You still need to provide a complete layer feed. What pasture gives your hens is exercise, sunlight for vitamin D, insects for protein variety, and fresh greens that produce those deep orange yolks and better-tasting eggs. Pasture makes the eggs better — but it doesn’t replace feed.
Understanding the Egg Cycle & Supplemental Lighting
Light drives everything. Once you understand this, the rest makes sense.
How Light Controls Egg Production
A hen’s reproductive system is triggered by light. Here’s the chain: light enters the hen’s eye and also penetrates the thin skull to reach the pineal gland → the brain releases reproductive hormones (FSH and LH) → the ovary releases a yolk (ovulation) → the egg forms around it in the oviduct over about 26 hours → the hen lays the egg → the cycle restarts. Each egg takes slightly longer than 24 hours to form, which is why hens lay a little later each day until they skip a day and reset the cycle.
The minimum photoperiod (hours of light per day) to trigger and sustain egg production is about 14 hours. Peak production happens at 16 hours of light. When daylight drops below 12 hours, the reproductive system shuts down and the hen goes into molt — shedding and regrowing feathers, which is an energy-intensive process that pauses egg laying.
Natural Seasonal Pattern
If you do nothing with lighting, here’s what to expect in the northern United States:
- March–April: As days lengthen past 14 hours, hens ramp into production.
- May–August: Peak laying. Long days, warm weather, abundant forage. This is when your egg basket is overflowing.
- September–October: Day length drops below 14 hours. Production slows. Many hens begin their annual molt.
- November–February: Short days, minimal to zero egg production. Hens are molting, regrowing feathers, and resting their reproductive systems.
- One important note: Young pullets in their first year of laying will often continue to produce through their first winter with reduced output, even without supplemental light. It’s in the second year and beyond that the seasonal shutdown becomes most pronounced.
Supplemental Lighting — If You Choose to Use It
By adding artificial light, you can maintain egg production through fall and winter. Here’s how to do it right:
- Add light in the early morning. Set a timer to turn a light on at 4–5 AM (adjust based on your latitude), and let the natural sunset tell the birds when to roost in the evening. If you add light in the evening and it shuts off abruptly, the hens are suddenly in the dark and can’t find their roost — they’ll end up sleeping on the floor.
- Target 14–16 total hours of light (natural + artificial). Never exceed 17 hours. Hens need at least 8 hours of darkness for rest and normal melatonin production.
- Start supplemental light in September as natural day length drops toward 14 hours. If you wait until production has already crashed, it takes longer to bring them back.
- Increase gradually: Add 30–60 minutes per week. Sudden jumps from 10 hours to 16 hours of light will stress the flock and can trigger an unwanted molt — the exact opposite of what you’re trying to achieve.
- Once you start supplemental light, never decrease it during the laying season. Any decrease in photoperiod signals the hen’s brain to begin shutting down production.
What Kind of Bulb?
Use a warm white LED bulb in the 2700K–3000K color temperature range. Research shows that red-spectrum light penetrates the skull most effectively to stimulate the deep-brain photoreceptors that control reproduction. A warm white or soft white LED has plenty of red wavelength. Avoid cool white or daylight-spectrum bulbs (5000K+) — they’re less effective at triggering the reproductive response.
You don’t need much intensity — hens only require about 5–10 lux (half a foot-candle) to respond. That’s roughly the light of a single 9-watt LED bulb in a standard coop. Just bright enough that you could read a newspaper at bird level. Brighter than necessary causes stress and pecking problems. Place the light above feeders and waterers and minimize dark shadow areas.
Solar-Powered Lighting for Mobile Coops
If your summer egg mobile doesn’t have electrical hookup, a small solar panel (50–100 watt) with a battery, timer, and LED strip or bulb creates a fully autonomous lighting system. These setups are inexpensive, reliable, and perfect for off-grid pasture operations. Set the timer to provide your morning light supplement and forget about it until you need to adjust the schedule seasonally.
The Natural Approach
There is absolutely nothing wrong with letting your hens molt naturally and take the winter off from laying. Some people prefer this — it follows the birds’ natural rhythm, gives them a full physiological rest, and some argue it supports longer productive lifespans. You’ll go without eggs for 2–4 months (or have dramatically reduced production), but the birds will return to strong production in the spring.
This is a personal decision. If you depend on consistent egg supply through winter — especially if you sell eggs — supplemental light is the practical solution. If you’re keeping a backyard flock primarily for your own family’s eggs and you can stock up or do without during the lean months, the natural cycle is a perfectly valid choice.
The Bottom Line on Production Lifespan
You’ll hear the claim that supplemental lighting “burns hens out faster” or makes them “run out of eggs.” The research doesn’t support this. Hens stop being productive layers after 2–3 years regardless of lighting management — it’s a function of age, not total eggs laid. Providing light in winter doesn’t speed up the aging process. What does reduce production is poor nutrition, parasite loads, stress, and dirty living conditions. Focus your energy there.
Wintertime Management
A separate winter coop, deep bedding, and unfrozen water. That’s the formula.
You Need a Separate Winter Coop
Your mobile summer coop is not built for winter. Trying to windproof a lightweight portable structure, manage deep bedding inside it, and run electrical for water de-icers and lights is a losing battle. For winter, you need a solid structure — a small shed, a section of an existing barn, or a dedicated coop building. Something you can:
- Seal against wind and drafts at bird level
- Run electrical to (for heated waterers and supplemental lighting)
- Manage deep bedding inside
- Access easily for daily egg collection and chores in bad weather
It doesn’t need to be fancy. A basic 8’×10’ shed with a good roof, solid walls, ventilation at the roofline, a door, and roosts inside will overwinter 20–25 hens comfortably. Many people convert garden sheds, lean-tos, or unused outbuilding spaces. The important thing is that it’s wind-tight at bird height but ventilated above.
Deep Litter Method
This is the simplest, most effective way to manage bedding in a winter coop. Start with 4–6 inches of pine shavings or straw on the floor. As the birds soil it, don’t clean it out — add a fresh layer of dry bedding on top. Over the course of winter, the bedding builds to 8–12 inches deep. The lower layers begin composting, which generates heat and helps warm the coop from the ground up.
Stir the bedding once a week with a pitchfork to prevent capping — a hard crust of packed manure that forms on top and traps moisture underneath. The goal is dry, fluffy litter that the chickens scratch through throughout the day. In spring, clean the whole thing out and put it directly on your compost pile or garden beds. It’s gold.
Allow 4–5 square feet per bird in the winter coop to give the deep litter system enough room to work and reduce pecking from overcrowding.
Ventilation vs. Drafts — Understand the Difference
Moisture is the real enemy in winter, not cold. Chickens are remarkably cold-hardy when they’re dry and out of the wind. A chicken’s body temperature runs around 105–107°F and they’re wearing a down jacket. What they can’t handle is damp, stale air — that’s what causes frostbitten combs and respiratory illness.
Keep ventilation openings (soffit vents, ridge vents, or adjustable vents near the roofline) open even in the coldest weather to let moisture escape. Block drafts at bird level — where the roosts and nest boxes are — so cold wind doesn’t blow directly on the birds while they sleep. Air should move above them, not across them.
Keeping Water Unfrozen
This is the single most important winter management task. Hens that go without water for even 12 hours will reduce or stop egg production, and recovery can take weeks. In freezing weather, checking and maintaining water is a twice-daily job at minimum.
- Heated waterer base: The most reliable option if you have electric. A thermostatically controlled base sits under your waterer and keeps it just above freezing. Plug it in, set the waterer on it, done. Available at any farm store for $30–50.
- Submersible de-icer: A small aquarium-style heater element dropped into a rubber tub of water. Effective and inexpensive.
- Insulated dark-colored rubber bowls in sunlight: On mild freezing days (high 20s to low 30s), a black rubber tub placed in direct sunlight can stay thawed through the warmest part of the day. Not reliable in hard freezes, but it works as a supplement.
- Check water at least twice daily. Morning and evening, minimum. Break ice, dump and refill if needed. There is no substitute for physically checking.
Winter Feeding
Continue layer feed as normal. In cold weather, hens burn more calories maintaining body temperature, so they may eat slightly more. Don’t restrict feed in winter.
A handful of scratch grains or cracked corn in the evening gives the birds something to digest overnight — the metabolic heat from digestion helps keep them warm through the coldest hours. This is a supplement, not a replacement for their balanced layer feed.
Keep oyster shell free-choice, always. Even though modern layer feeds include calcium, hens that are still producing through winter may need the extra supplementation to maintain strong shells.
Offer greens when you can — kitchen scraps (vegetable peels, leafy tops, overripe fruit), a whole cabbage hung from a string for pecking enrichment, or sprouted fodder trays if you want to put in the effort. In winter, the pasture greens they had in summer are gone, and any fresh plant matter is a welcome treat.
Egg Collection
In cold weather, check for eggs 2–3 times daily. Eggs left in the nest boxes in sub-freezing temperatures will freeze and crack. A frozen egg is a wasted egg — and broken eggs in the nest boxes can start the habit of egg eating.
Let Them Out on Nice Days
Even in winter, if the temperature is above freezing and the wind is calm, open the door and let them out. They’ll get some fresh air and sunshine and come back inside when they’re ready. Chickens are tougher than most people give them credit for. A sunny, calm 35°F day is a perfectly good chicken day.
One thing to know: chickens hate snow. They do not like the feeling of it on their feet and they will not scratch around in it the way they do on bare ground. If there’s snow cover, most birds will stand at the coop door and refuse to go out — or they’ll venture out only if they can see a clear patch of ground they can reach through a short stretch of snow. Don’t worry about it. If the ground is covered, they’re fine staying inside. They’ll come out eagerly when conditions suit them.
Feed Guide: The Full Lifecycle
Four feeds, one rule of thumb, and the stuff most guides skip.
Feeding laying hens is not complicated if you understand the lifecycle. There are four phases, and each one has a specific feed requirement.
| Phase | Age | Feed Type | Protein | Notes |
|---|---|---|---|---|
| Starter | 0–8 weeks | Chick Starter | 18–20% | Medicated (amprolium) or non-medicated. Fine crumble texture for small beaks. |
| Grower | 8–18 weeks | Grower / Developer | 14–16% | Lower protein, no added calcium. Supports frame development without overloading kidneys. |
| Layer | 18 weeks+ | Layer Feed | 16–18% | Added calcium for eggshells. Supplement with oyster shell free-choice. |
| Molt | During molt | Grower or higher-protein feed | 18–20% | Feathers are ~85% protein. Some producers switch to a grower or gamebird feed during molt to support feather regrowth. |
The Quarter-Pound Rule
Each laying hen eats roughly ¼ pound of feed per day. That’s a good rule of thumb for budgeting. For a flock of 25 hens, you’ll go through approximately 3–4 fifty-pound bags of layer feed per month. Larger-bodied breeds (Orpingtons, Australorps) eat more; lighter breeds (Leghorns) eat less.
Feed Budget: 25 Hens
Raising 25 pullets to 18 weeks: ~7–9 fifty-pound bags of starter/grower total (breed-dependent).
Monthly layer feed for 25 hens: ~3–4.5 fifty-pound bags per month.
Pasture-raised birds eat about 10–15% more than confined birds due to higher activity levels. Budget accordingly.
Water
Hens drink roughly twice as much water (by weight) as they eat. A hen eating ¼ lb of feed needs about ½ lb (roughly 1 cup) of water per day under normal conditions — more in hot weather. Water consumption also increases as protein content of the diet increases. Never restrict water. A sudden drop in egg production is often a water problem before it’s a feed problem. Check waterers daily.
Grit
Chickens don’t have teeth — they swallow small stones and grit that sit in the gizzard and grind up forage, grass, seeds, and insects. Without grit, they can’t properly digest anything beyond processed feed. Here’s the good news: if your birds are truly raised on pasture, they don’t need supplemental grit. It’s all over the ground in the form of small stones, gravel, and coarse sand. Pastured birds pick it up naturally every day as they scratch and forage. Supplemental grit in a separate feeder is really only necessary for birds raised in confinement on processed bedding where there’s no natural stone available. If your birds are on dirt and grass, they’re already getting what they need.
Calcium
Oyster shell in a separate feeder, always available. Most modern layer feeds already include calcium in the formula, which handles the baseline needs of most birds. But not every hen processes calcium at the same rate — some birds will still lay soft or thin-shelled eggs on layer feed alone, especially high-production breeds and older hens. A separate free-choice container of crushed oyster shell lets each hen take extra calcium when she needs it. It’s cheap insurance against soft shells and the egg-eating habit that broken eggs can start. Crushed oyster shell is available at any farm store and a single bag lasts a long time.
Do not mix calcium directly into the feed. Hens self-regulate calcium intake based on their individual needs. If you mix it in, every bird gets the same dose regardless of need, and birds that aren’t laying (young birds, molting birds) get calcium they can’t use, which stresses their kidneys. Keep it separate and let them manage it themselves.
What Not to Feed
Chickens are omnivores and will eat almost anything. Most kitchen scraps are fine in moderation — vegetable peels, fruit, bread, cooked rice, meat scraps. Avoid: avocado (contains persin, which is toxic to birds), raw or dried beans (contain phytohaemagglutinin, toxic until fully cooked), chocolate, excessively salty foods, and anything moldy. And never feed chickens feed that has gotten wet and started to grow mold — mycotoxins are invisible and can be lethal.
Predator Protection
You are raising chicken nuggets in the open air. Everything wants to eat them.
This is not an exaggeration. Chickens are prey animals, and the list of things that will happily eat them includes hawks, owls, eagles, foxes, coyotes, raccoons, opossums, weasels, minks, skunks, stray dogs, and even your neighbor’s house cat. The single most important management decision you make is how you protect your flock from predators.
Rule #1: Lock Them Up at Night
Non-negotiable. The vast majority of poultry losses happen at dusk, after dark, and at dawn. Raccoons, foxes, weasels, and owls are all most active during these hours. Every night, your birds need to be inside a secure coop with the door closed. Every. Single. Night.
Layered Defense
No single measure stops every predator. The goal is multiple layers of protection so that each threat runs into at least one barrier:
- Secure coop construction: Use ½-inch hardware cloth on all openings — windows, vents, and any gaps. Not chicken wire. Chicken wire keeps chickens in but does not keep predators out. A raccoon can reach through standard chicken wire and pull a bird apart piece by piece. A weasel or mink can squeeze through any opening larger than 1 inch. Hardware cloth stops them both.
- Automatic coop door: A light-sensor or timer-operated coop door closes at dusk and opens at dawn without you needing to be there. These run $100–200 and are worth every cent. They eliminate the human error of forgetting to close the coop on the one night a fox shows up.
- Electric poultry netting: For daytime pasture access, properly energized netting is your best ground-predator defense. A fox or coyote hits the fence, gets shocked, and leaves. See the Pasture Setup section for our detailed recommendations on energizer sizing, brands, and the critical importance of having enough joules to maintain voltage through nighttime dew and grass pressure — this is where most setups fail.
- Aerial predator deterrents: Hawks and owls are the hardest to stop. Provide cover structures on the pasture — shade shelters, bushes, pallet-and-cinder-block lean-tos, anything that gives the birds a place to dive under. A rooster is genuinely helpful here — roosters watch the sky constantly and sound alarm calls that send the hens running for cover. Fishing line or reflective tape strung in a loose grid above the run area can also deter diving hawks, though these are imperfect solutions.
- Clear perimeter: Keep the area around your coop and run clear of tall grass, brush piles, and debris where predators hide and stage their approach. A predator that has to cross open ground to reach your coop is more likely to be spotted or deterred.
The Enclosed Coop Advantage
If you’re using a small portable coop-and-run combo (as discussed in the Pasture Setup section), your birds are physically contained and protected around the clock. Wire-enclosed runs stop most predators on their own, especially if the wire is hardware cloth and the run has a covered top. For small flocks where the owner isn’t around during the day, this approach largely solves the predator problem.
The Hardest Lesson in Chicken Keeping
You will likely lose a bird to a predator at some point. It’s part of raising animals outdoors. The goal is to make it as rare as possible through good management, not to achieve a zero-loss guarantee. Learn from each incident, improve your defenses, and move forward. Every experienced chicken keeper has a predator story.
Health, Molt, and the Long Game
What to expect after year one — and when to add new birds.
The Annual Molt
Every fall, as daylight decreases, your hens will molt. They lose their old feathers and grow a complete new set. During this time, egg production slows dramatically or stops entirely for 2–4 months. This is not a sign of illness — it’s biology. The energy that was going into egg production gets redirected into feather regrowth.
Feathers are roughly 85% protein, so molting birds benefit from higher-protein feed. Some keepers switch to a gamebird or grower feed (18–20% protein) during molt, then switch back to layer feed as the birds come back into production. Make sure they have good nutrition, clean water, and low-stress conditions, and leave them alone. They look rough — sometimes alarmingly naked — but they’re fine.
Year 2 and Beyond: The Production Curve
A hen’s first full laying year is her best. After that, expect egg production to decline about 15–20% per year. The eggs she does lay get larger, but fewer. By year 3, most hens are producing significantly less than their first year. The feed cost per egg climbs as production drops.
This means you need a plan for flock turnover:
- Add new pullets each spring to keep your total production steady as older birds decline. A flock of mixed ages ensures you always have first-year layers in the peak of their cycle.
- Keep older hens as part of the flock. They still lay — just fewer eggs. Many people keep them for years as companions, pest control, and pasture workers.
- Process older hens as stewing hens. A 2–3 year old laying hen isn’t a tender roasting bird, but she makes excellent broth and stewed chicken. Some small flock owners process them, others don’t — there’s no wrong answer here.
- Sell older hens at a local livestock auction. Most areas have small animal or poultry auctions where laying hens — even older ones past their peak — sell to other flock owners, homesteaders, or folks looking for affordable birds. It won’t make you rich, but it recovers some value from birds that are no longer pulling their weight in your operation and puts them in the hands of someone who can still use them.
Common Health Issues to Watch For
A Word on Production Animal Economics
This needs to be said plainly: laying hens are production animals, not house pets. That doesn’t mean you don’t care for them well — clean living conditions, good feed, fresh water, pasture rotation, and working in step with the natural cycles are the foundation of healthy birds. But when a bird gets sick or injured, you need to weigh the cost of intervention against the actual value of the animal. A laying hen costs you $15–25 to raise or purchase. A single vet visit can run $200–400 — with no guarantee the bird survives. Putting a sick bird down humanely to end its suffering is not inhumane. It’s a responsible, practical decision that farmers have made for as long as people have raised livestock. You are not a bad person for choosing not to spend hundreds of dollars trying to save a $20 chicken. Focus your energy and money on prevention — clean coops, dry bedding, pasture rotation, good nutrition, and biosecurity. Those investments protect the whole flock, not just one bird.
External parasites — mites and lice: Check under wings and around the vent area regularly. You’ll see clusters of tiny insects, or in the case of mites, reddened irritated skin. Providing a dust bathing area (dry dirt, sand, or a mix with food-grade diatomite earth) goes a long way toward prevention. The birds dust-bathe daily and it suffocates external parasites naturally.
Respiratory illness: Sneezing, wheezing, nasal discharge, watery eyes, lethargy. Isolate any sick bird immediately and monitor. Respiratory illnesses can spread through a flock quickly. Some are manageable; some are serious. If multiple birds are affected, contact your local agricultural extension office for guidance. For a single bird that isn’t improving after a few days of isolation, it’s often more practical to cull the bird than to pursue expensive treatment — especially since some respiratory diseases make recovered birds permanent carriers that can reinfect the rest of your flock.
Bumblefoot: A bacterial infection that causes a swollen, hardened abscess on the bottom of the foot pad. Usually caused by a puncture wound from rough roosts, sharp objects, or hard landings from jumping off high perches. Smooth, rounded roosts and reasonable roost heights (2–3 feet) help prevent it. If caught early, it can be treated at home by cleaning, removing the core, and bandaging — no vet needed.
Egg binding: A hen is “egg bound” when an egg gets stuck in the oviduct and she can’t pass it. Signs: straining, sitting low and puffed up, lethargy, waddling. It’s uncommon but serious. A warm bath (warm water up to her vent), calcium supplementation, and a quiet, dark space can help her pass the egg. If she doesn’t improve within a few hours, you have a decision to make. A vet visit for egg binding can easily run $200 or more, with no certainty of success. For a small-flock production bird, humane culling is a reasonable choice. It’s not the easy choice — especially if you’ve raised the bird from a chick — but it’s an honest one.
Biosecurity
If you bring new birds into your flock (from a hatchery, swap, or purchase), quarantine them for at least 2 weeks before exposing them to your existing flock. This gives you time to observe for signs of illness. Change shoes and wash hands if you visit other people’s poultry operations before handling your own birds. These are simple habits that prevent disease introduction.
Why Pasture-Raised Matters
This is about more than eggs.
When your hens walk on living grass, scratch through soil, eat insects and forage, bask in the sunlight, and express every natural behavior they were designed for — you end up with an egg that is fundamentally different from what sits in a grocery store carton. The yolks are deeper in color. The shells are thicker. The flavor is richer. The nutritional profile is better.
But it goes deeper than the egg itself.
Every day your hens are on pasture, they’re depositing manure directly into the soil — a source of nitrogen, phosphorus, and organic matter that builds fertility, improves water retention, and feeds the microbial life that makes healthy soil. They scratch and aerate the surface. They eat pest insects and weed seeds. They break disease cycles by consuming parasite larvae in the pasture. When managed as part of a rotation — especially following cattle or other ruminants — chickens are a biological tool for land regeneration.
This is what pasture-raised actually means: animals living on the land, improving the land, and producing food that reflects the health of that land.
What About the Labels at the Store?
It’s worth understanding what those carton labels actually mean — and don’t mean:
- “Cage-Free” means the hens aren’t in battery cages. They’re still inside a barn, often by the thousands, with no outdoor access.
- “Free-Range” means the hens have “access” to the outdoors — which in practice often means a small door in a massive barn that most birds never use. There’s no requirement for how large the outdoor area is.
- “Pasture-Raised” — there is no federal regulation for this term. Any producer can put it on a carton. Some third-party certifications (like Certified Humane) define it as 108 sq ft of outdoor space per bird, but the label alone is meaningless without certification.
When you raise your own birds on pasture, you don’t need a label. You know exactly how they live, what they eat, how much room they have, and what the land looks like under their feet. That knowledge — that certainty — is worth more than any marketing stamp on a grocery store carton.
Raising laying hens on pasture is one of the most accessible, rewarding entry points into producing your own food. It doesn’t require a lot of land, a lot of money, or a lot of experience to start. It requires attention, consistency, and the willingness to learn from your birds and from the land they walk on. Start small, get the basics right, and let the flock teach you the rest.
“The earth is the Lord’s, and everything in it, the world, and all who live in it.”
— Psalm 24:1
More from the Blog

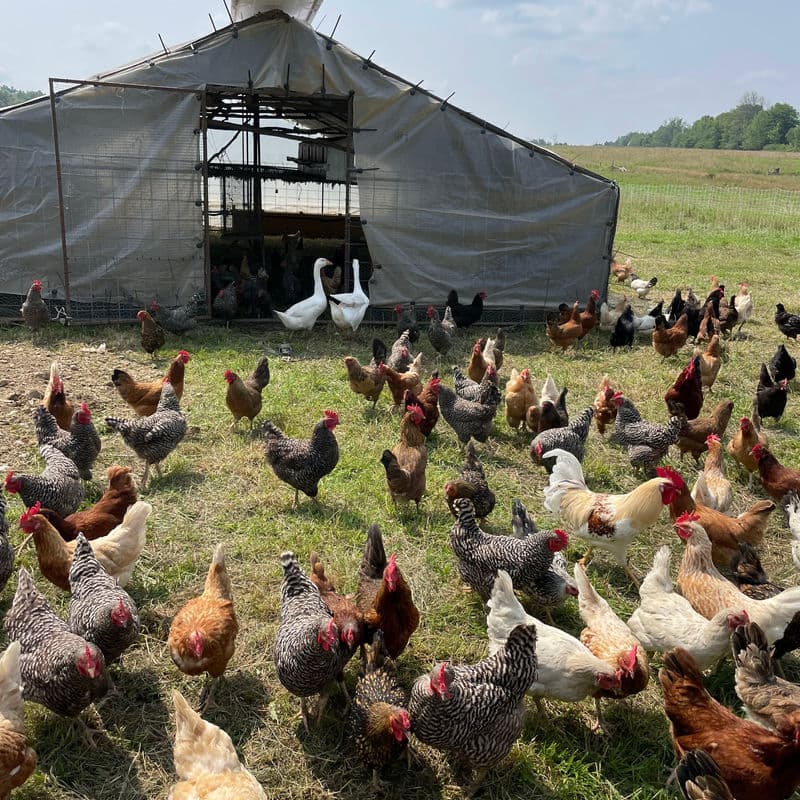
How Our Hens Live Outdoors Year-Round — Pasture, Daylight, and Living Soil
How our laying hens live outdoors on living ground all year — rotated across pasture in the Egg Mobile through the growing season, and on the earth floor of a daylight high tunnel through the Pennsylvania winter.
Pasture Raised vs Store Bought Eggs — What's the Real Difference?
What really sets pasture-raised eggs apart from store-bought — and why it comes down to how the hen lives, not the numbers on a label.
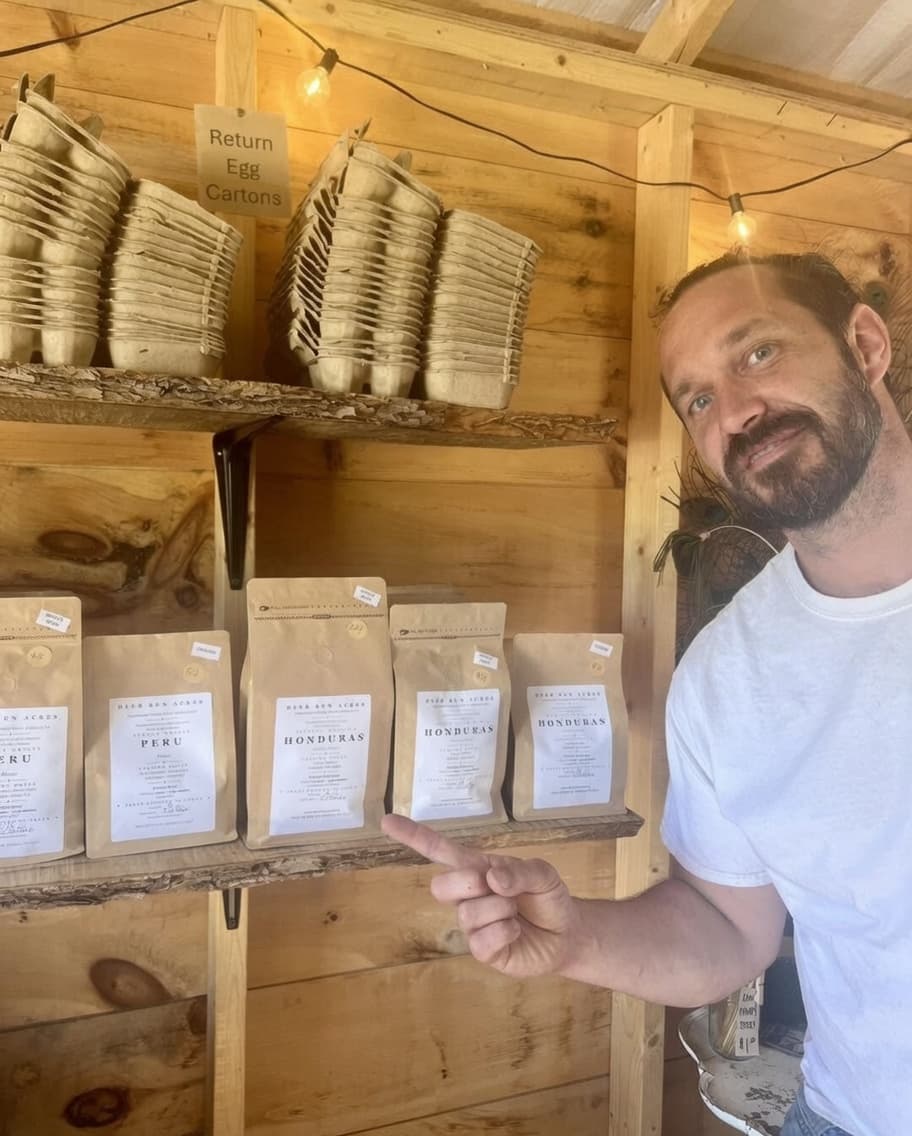
Why We Roast Our Own Coffee
The fifteen-year story behind Deer Run Acres coffee — from a popcorn-popper roaster in 2011 to a licensed roastery on our regenerative family farm.
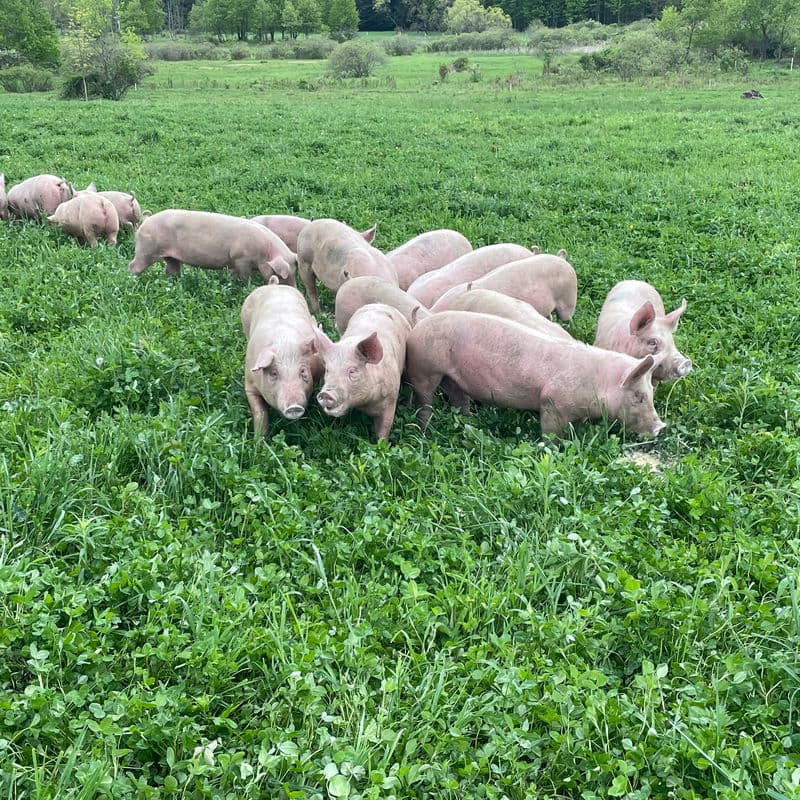
The Truth About Pasture-Raised Pork: Why the Way We Raise Pigs Changes Everything
From the soil up — what really separates our pasture-raised pork from what's sitting in the grocery store cooler. A complete look at how we raise our pigs, what "pasture-raised" actually means, and why where a pig lives changes the meat itself.
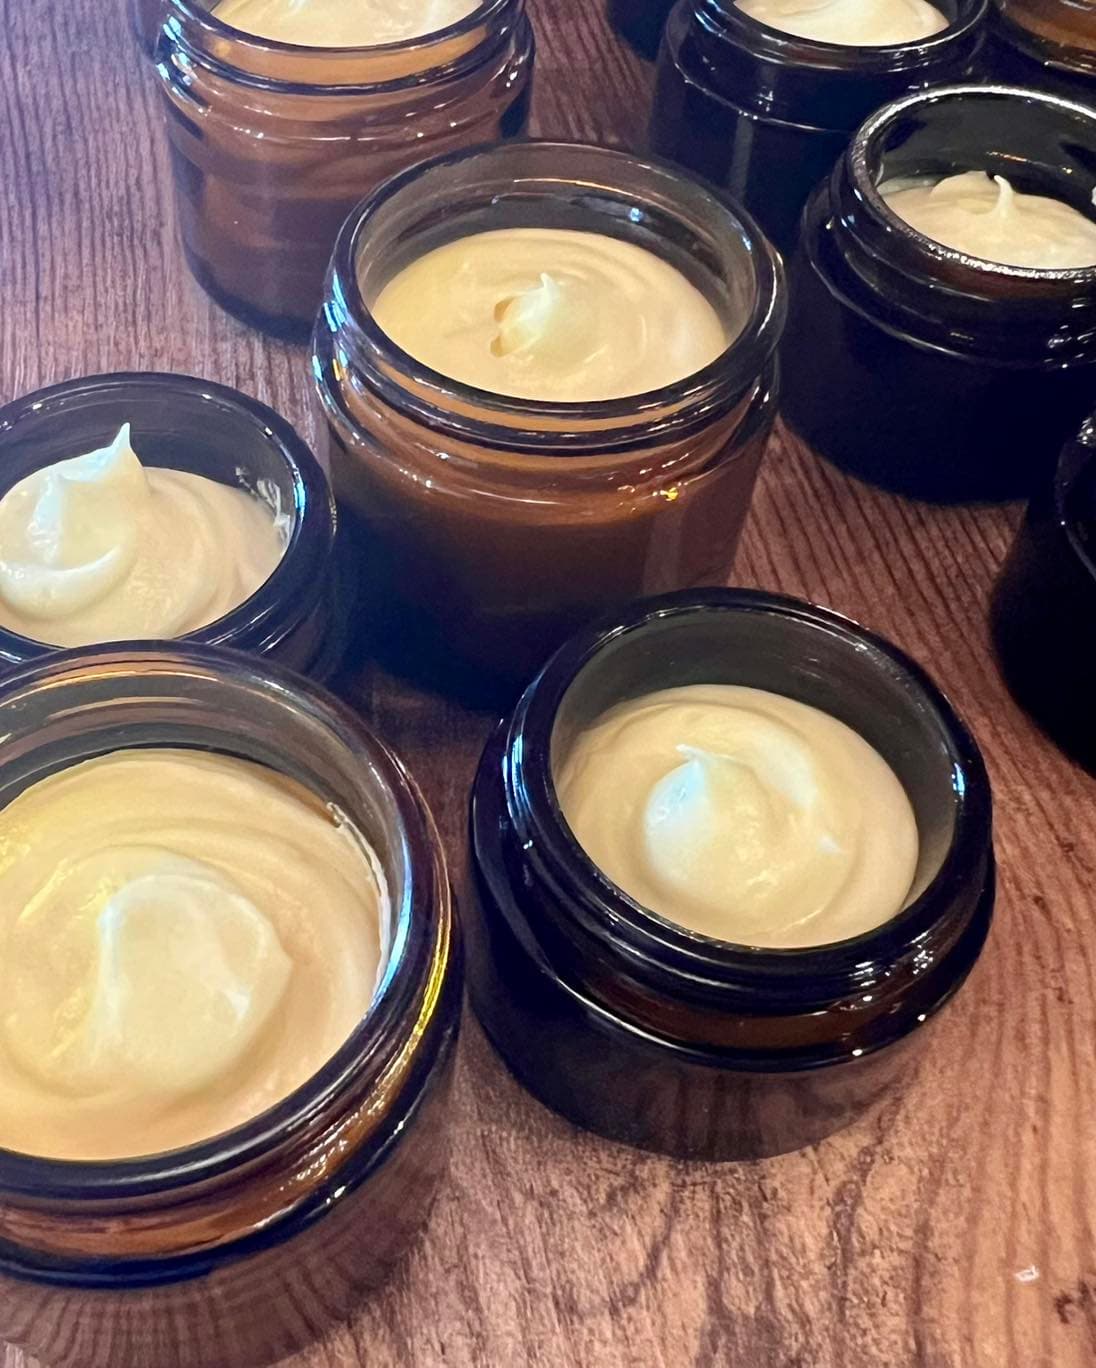
What's Actually In Our Whipped Tallow Balm — And Why That Matters More Than You Think
Most "natural" skincare isn't. Five ingredients or fewer in every jar — here's exactly what goes into our herbal-infused whipped tallow balm, what we leave out, and why the difference shows up on your skin.